Splitting Documents
At times you may find it necessary to split a single document into smaller documents. This can be done with the document split function in the Document Viewer. To split a document, just follow these easy steps:
1. Open the Document Viewer and select the document you want to split
2. Click the SPLIT/MERGE button on the upper right hand side of the Viewer next to the UPDATE button.
NOTE: For the Unfiled document type, the label of this button may say "Index" instead of "Split/Merge" but clicking the button produces the same result.
![]()
![]()
3. The document to be split will open in a pop out box
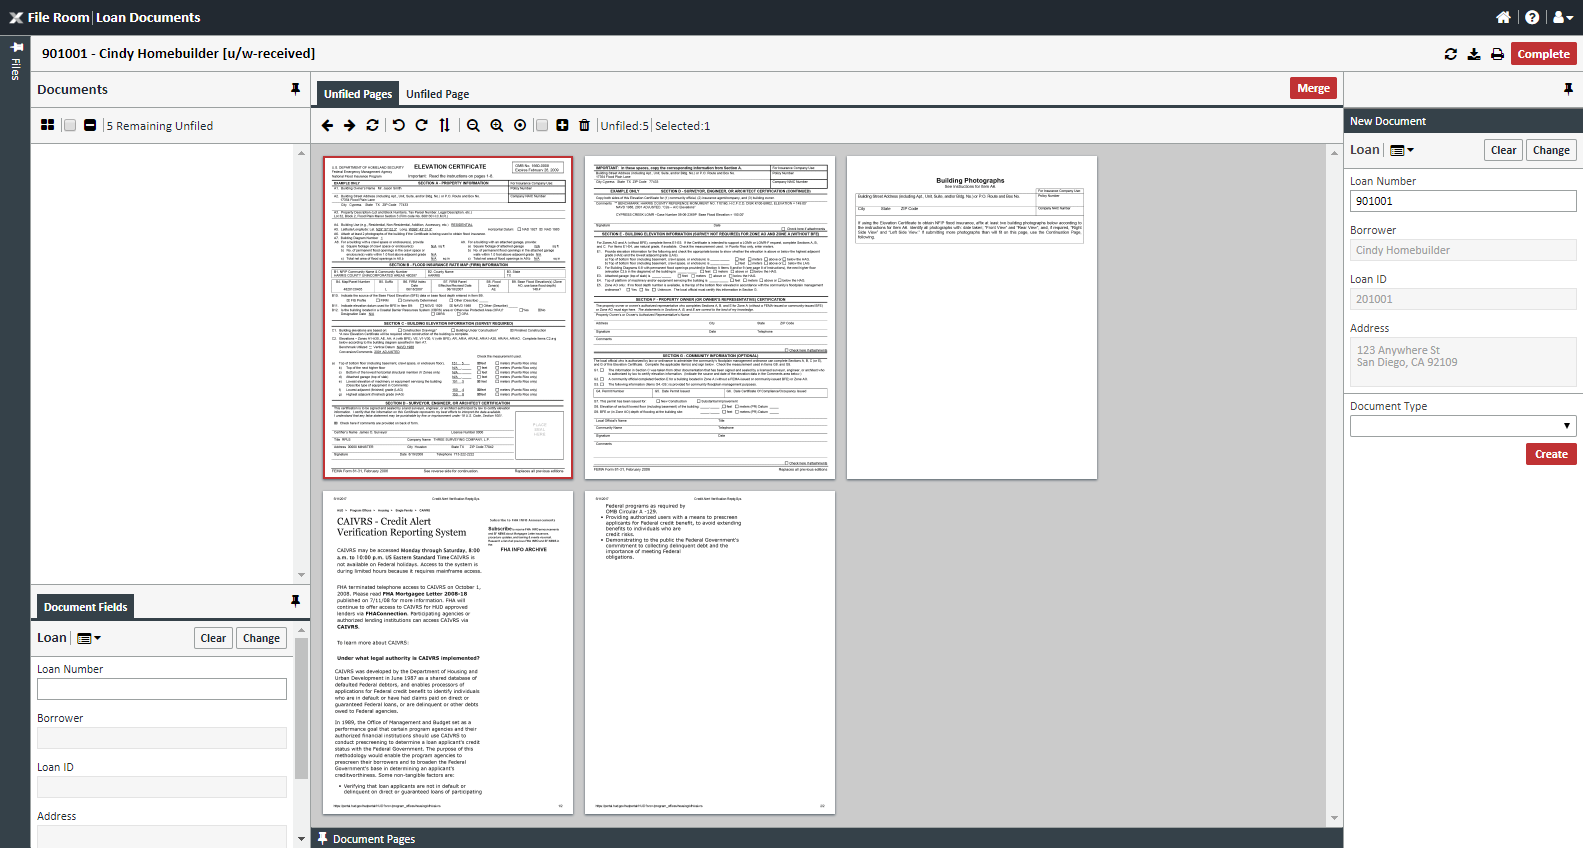
4. In the Unfiled Pages tab, select the pages you would like to save to a separate document. The first selected page will have a red border and the rest will have a blue border. You can select multiple pages with Ctrl+Click(Press Ctrl and then clicking on all pages you want to select, then releasing the Ctrl button) and multiple consecutive pages with Shift+Click (Click the first page in the sequence, press the Shift key, and while that is pressed, click on the last page in the sequence, then release the shift key)
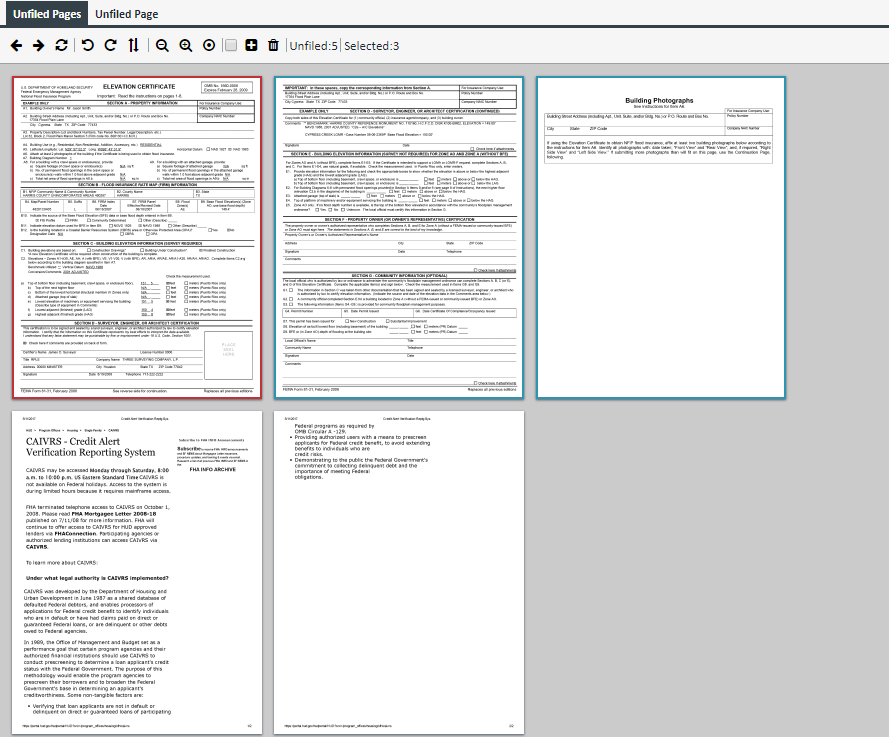
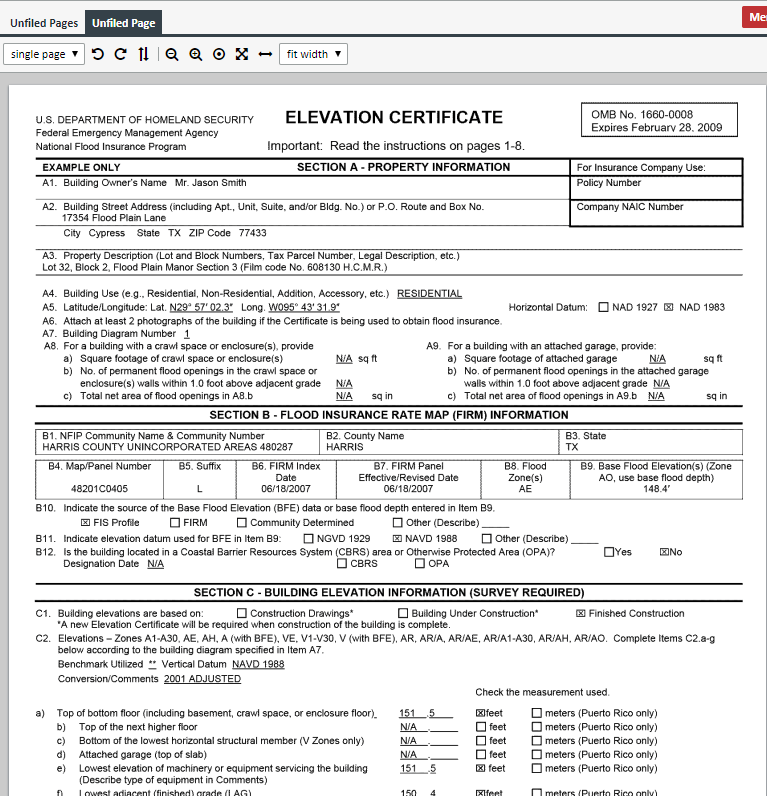
5. If you want to see a larger version of the page, simply double-click the thumbnail to see it at full screen in the "Unfiled Page" tab. To go back to the thumbnails, simply double-click again.
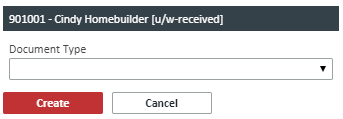
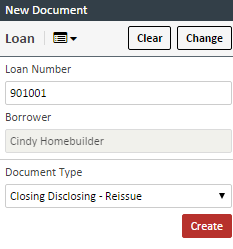
6. There are now two ways to assign pages to a document. In the first way, once you have selected yourt pages, simply right-click and a quick assign windown will pop up. Then just choose the document type and any other fields, then click CREATE. On the right hand pane, select the appropriate loan number and document type for this split document.
7. In the second way, choose your pages, and on the right hand pane, select the appropriate document type and fields for the document
8. Repeat this process for all pages
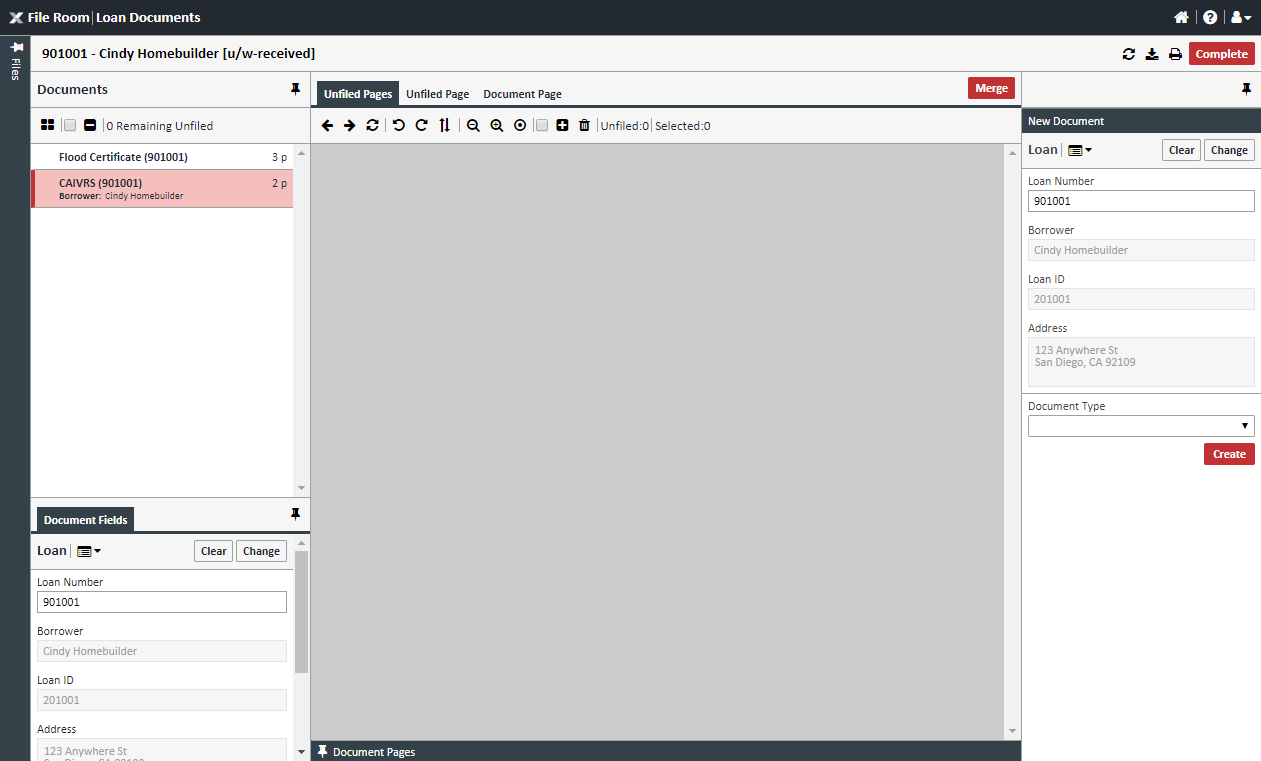
9. Once you have completed this exercise, click COMPLETE to complete the process and your documents will be split
NOTE: The original document may still appear in the Document Viewer depending on the configuration setting in the XDOC Admin
