System Users
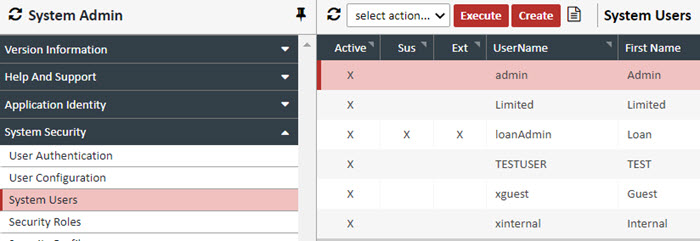
The System Users section lists all users in the XDOC system. For customers with LOS integrations, these users are automatically created with the LOS integration. Any new users can be created manually, either for test purposes or for users not integrated with an LOS. (Internal projects)

Creating a User – To manually create a user, follow the procedure below:
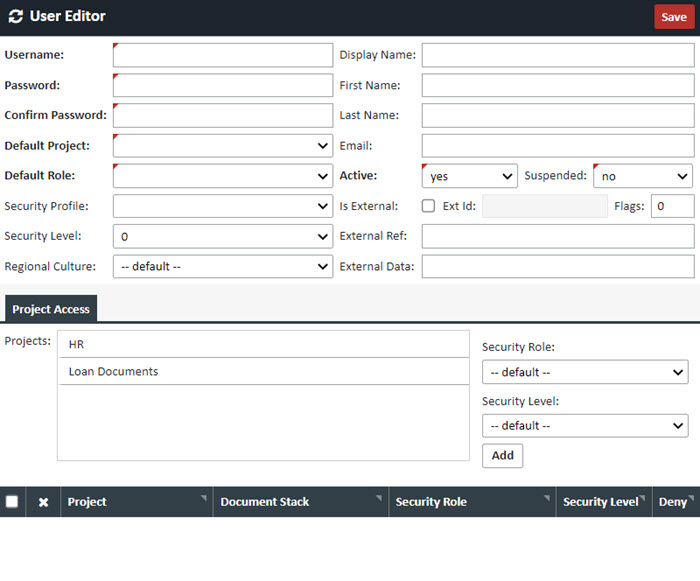
1. From the User grid, click CREATE. The User Editor appears.

2. Complete the following fields: (Required fields are in BOLD)
| Field | Description |
|---|---|
| Username | Choose a username. This will be the username you log in with |
| Password | Password for this user |
| Confirm Password | Confirm the password for the user |
| Default Project | The default Project for this user. This can either be set here or in the Project Access tab below. |
| Default Role | Choose the Role assigned to this Profile |
| Security Profile | Security Profile assigned to this loan |
| Security Level | This field is not used at this time. It is reserved for future use. |
| Regional Culture | Leave as either "default," or "en-US" |
| Display Name | The name displayed in XDOC while working in the application |
| First Name | User's first name |
| Last Name | User's last name |
| User's email address | |
| Active | For active users, will be set to "yes" |
| Suspended | You can suspend the account's XDOC access by setting this to "yes" |
| Is External | Checkbox to signify an external user integrated from an outside application. This will be set automatically by with your LOS integration |
| External ID | The ID of the user, integrated from the external system |
| Flags | Please donot modify this field. It is set by the LOS integration. |
| External Ref | Additional integration information from the LOS integration |
| External Data | Additional integration information from the LOS integration |
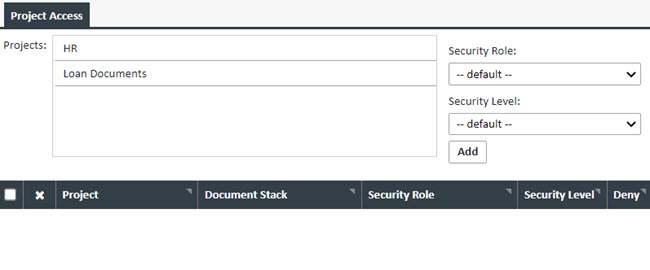
3. Optionally, in the Project Access Tab, in the Project Security>Project box, either double click the "Loan Documents" project to move it down to the active list of projects for this User, or simply highlight it, choose a Project from the dropdown, and click ADD

4. Optionally, you can choose a Security Role from the dropdown box.
5. When you are done creating your User, click SAVE
