Working with Conditions
Conditions Management is a powerful new feature in XDOC (for version 6142 and above) that allows users to view, assign, and modify the assignment of conditions with a document. LOS Conditions are made part of the data integration to ensure condition/document data is shared betwen applications. Therea are not ony features in the XDOC user interface, but also the XOC API. Below is a summary of the features for both sections
XDOC User Interface
- View conditions for a loan
- Assign conditions to a document
- Unassign a condition from a document
XDOC API
- Launch the XDOC viewer to see all documents that satisfy a particular condition
- Add a condition to an XDOC document type
- Remove the association of a conditinon to a document
There are four sections to this page. Click the link to navigate to the section of the page you wish to see.
- Permissions for Conditions Management
- Assigning Conditions in the Document Viewer
- Assigning Conditions with Document Upload
- Assigning Conditions in the Print Client, File Room, and Split/Merge Sections
Permissions for Conditions Management
The following are the permissions needed to use Conditions Management. XDOC Adminisrators must modify the security role in the XDOC Admin for users working with conditions.
- View all conditions associated to a document (uses the XCONDITIONVIEW permission)
- Assign conditions to a document (uses the XCONDITIONASSIGN permission)
- Unassign (remove) a condition from a document (users the XCONDITIONUNASSIGN)
Conditions in the Document Viewer
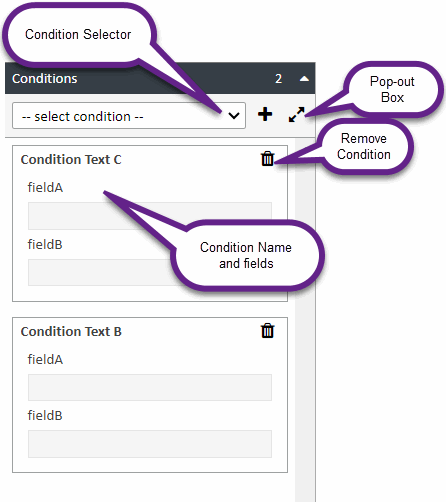
There is a new accordion option for conditions, located on the right hand side of the viewer. This is where document associations with conditions are viewed, assigned, and modified. There will be number on the accordion indicating the number of conditions associated to the document.

Expand the accordion to see the conditions assigned to this document
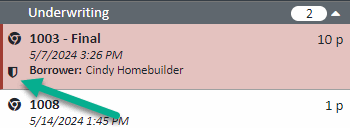
Any documents assigned to a condition will have a shield icon shown on the left side in the document list.
Assigning Conditions in the Document Viewer
To assign conditions in the document viewer:
- In the document list, highlight the document you want.
- On the right side of the viewer, click the "Conditions" accordion
- Click the condition selector drop-down and select the condition you want
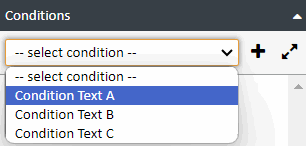

- Click the "+" icon to add it to the document and the condition will be assigned to the document
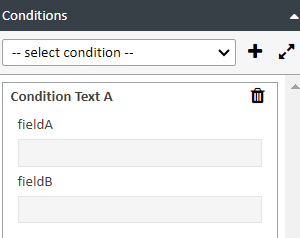
- Repeat steps 3 and 4 to add more conditions to the document
- When done, click UPDATE at the top right of the screen.
Using the Pop-Out Box to Assign Conditions
Since condition names can be very long, we created a pop-out box so users can see more of the condition name at a glance when assigning conditions. To use the pop-out box method:
- From the conditions accordion, click the pop-out box icon
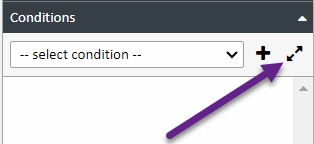
- From the pop-out box that appears, choose your conditions and click the "+" icon to add them to the document

- Once added, click COMPLETE to assign the conditions. The box will automatically pop back in. You can also click CANCEL to cancel any changes and the box will also pop back in.
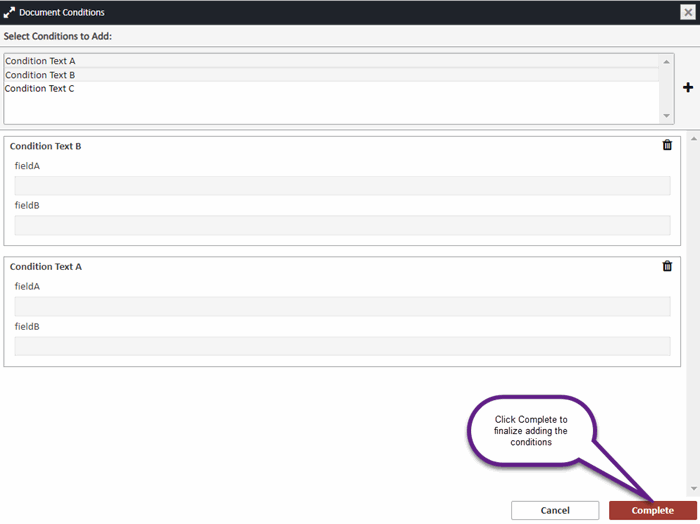
- Click UPDATE to save changes
Assigning Conditions in Document Upload
Whether you're using the drag and drop method or the standard method, assigning conditions to a document when uploading is a very easy process and is similar to the process in ther Viewer.
- Drag in your document(s) or choose your document from a folder
- Choose the condition(s) this document satisfies. Each document you upload will have a separate place to choose a condition
- Click SUBMIT

Working with Conditions in the Print Client, File Room, and Split/Merge Sections
Because all of these XDOC sections user the same user interface, the usage instructions are also the same.
Print Client -Initial Screen
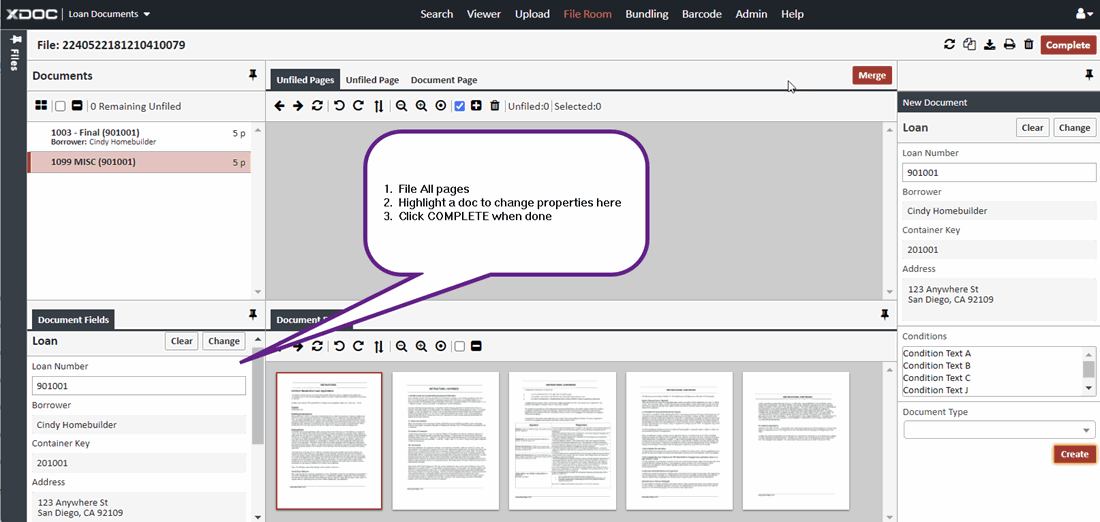
There are two places where you could assign conditions while in the print client. The first is the initial screen shown below. For this screen there is no need to highlight any pages. We are assuming all pages are getting indexed to one document type. To assign conditions from this screen:
- Choose your loan number
- Choose your document type
- Choose any document type fields (if any)
- Choose your conditions
- Click COMPLETE
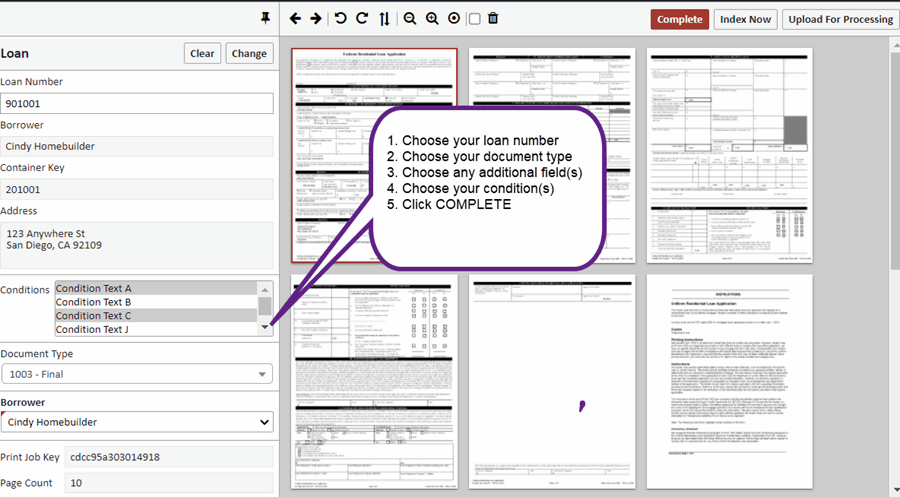
Print Client (Index Now), File Room, Split/Merge Screen
In this user interface you can split up document pages into multiple document types. To start:
- Highlight pages to index
- Choose your loan number
- Choose your document type
- Choose any document fields (if any)
- Choose your condition(s)
- Click CREATE
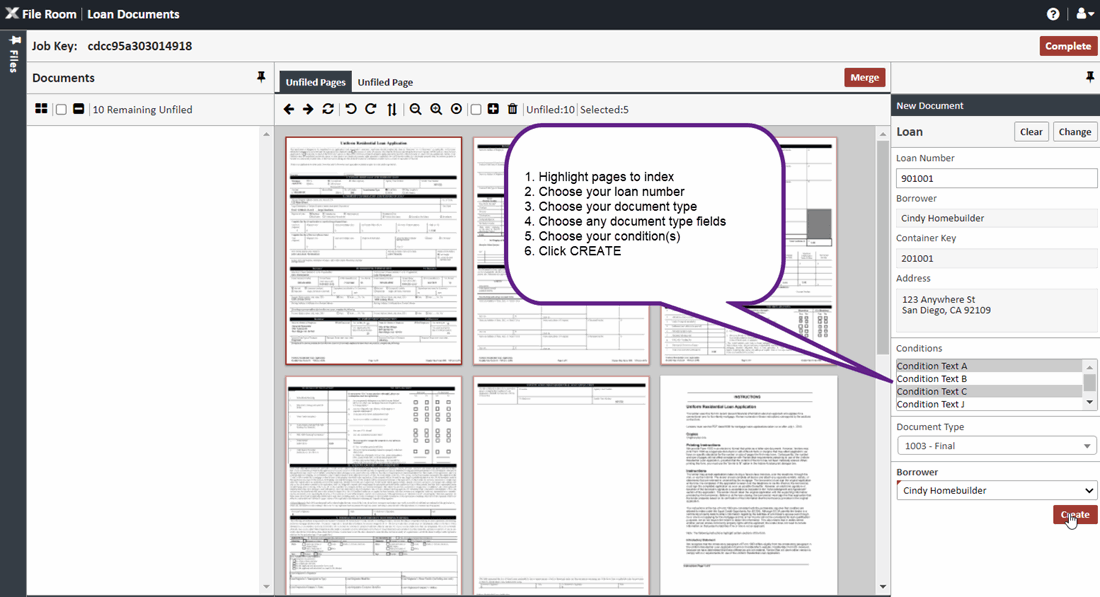
Then continue indexing pages until all pages are filed. Then click COMPLETE
