List Definitions and Field Definitions
XDOC gives product Administrators the ability to create various fields and field lists for use in Document Definitions, Bundling, E-mail Notifications, etc. These fields and lists can provide additional critical information to further enable your workflow. The following are two common examples of how to use field definitions and list definitions, together and separately, to improve your XDOC workflow.
Document Definitions Example: You want to add a "Tax Year" field to a "Tax Return" Document Definition, with a list of tax years. In this example, we will perform the following steps to accomplish this task:
1. Create the List (In List Definitions)
2. Create the Field Definition (that incorporates the list in #1 above)
3. Assign the Field to the Document Definition
4. Test using the Document Upload utility
Creating the List
1. In the XDOC Admin, go to Project Repository>List Definitions
2. Click the CREATE button 3. The List Editor will appear
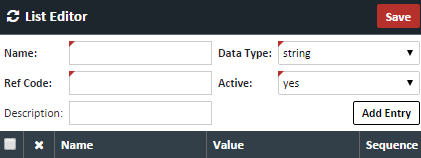
4. Fill out the following fields
| Field | Value |
|---|---|
| Name | Name for the Field – Tax Year |
| Ref Code | Additional code, or identifier, for this field |
| Description | Additional description, if any |
| Data Type | Choose the appropriate data type for this field |
| Active | Set to Yes |
5. Click the ADD ENTRY button to add an entry
6. Add all Tax Years for this list
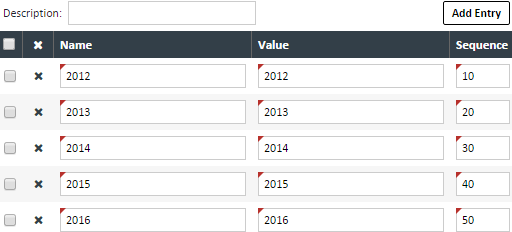
- To avoid confusion, it’s best if you make the "Name" and "Value" the same
- The sequence number represents the order in which the entries of the list will appear. If all entries have the same number, as above, the list will show in alphabetical or numeric order
7. When done, click the SAVE button
Creating the Field Definition
1. In the XDOC Admin, go to Project Repository>Field Definitions
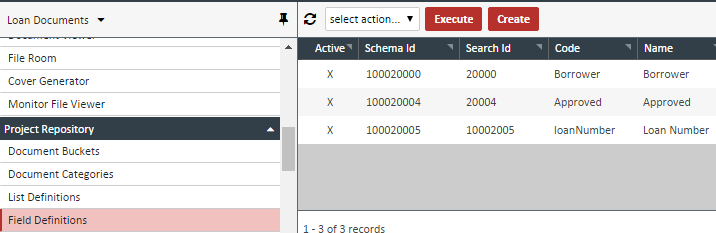
2. Click the CREATE button. The Field Editor will appear
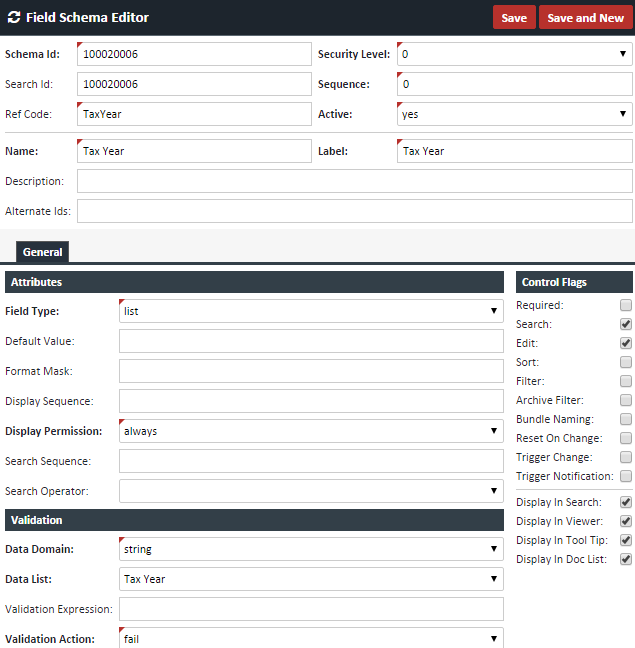
3. Enter information for the following fields. Everything else leave as is.
| Field | Description |
|---|---|
| Schema Id | Should be pre-populated. Leave as is. |
| Search Id | Same as Schema ID |
| Name | Enter a name. In this instance, "Tax Year" |
| Label | Should normally be the same as the "Name" field |
| Description | Enter an additional description if you want |
| Field Type | Choose "list" |
| Default Value | Choose a default Tax Year, if any. For this list, leave blank |
| Data List | Choose "Tax Year" |
| Control Flags | Choose all checked boxes in the screen shot above |
4. Click SAVE
Assign the Field to the Document Definition
1. In the XDOC Admin, open the Document Schema Editor for the document in question, in this case the Tax Return
2. In the "Fields" Tab, click on the “Tax Year” field and click ADD
3. The list of fields will look like this:

NOTE: It is recommended that you check the "Required" checkbox. This will eliminate the possibility of a blank value in that field. If this is a versioned document, you should also check the "Version" checkbox.
4. Click UPDATE
Test using the Document Upload Utility
1. Navigate to the Document Upload utility
2. Choose the Tax Return from the document list
3. Click on the "Tax Year" drop down field
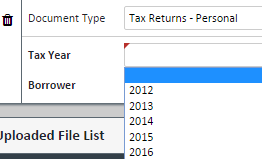
4. The "Tax Year" label will be bolded, meaning that it is a required field, and the list values are present in the proper order. Bundle Templates List Definitions are used in Bundle Templates to define various investor-specific parameters. XDOC's out of the box templates already have the appropriate list definitions defined, and these can be used as a guide for any future lists that need to be created for an Investor, Servicer, MI Company, QC Company, Auditor, etc.
Example: You need to set up a Bundle Template for a new Servicer. This Servicer has very specific package types relates to their business called of SLR, SPR, SMR, AOB, and S4. These names must be part of the ZIP file naming when sent to their SFTP site. In this example, you will:
1. Create the list in List Definitions
2. Create the Custom Property in the Custom Properties tab of the Bundle Template, incorporating the list
3. Edit the ZIP file naming to incorporate this new property
4. Set the appropriate permissions in the Bundle Template
5. Test the delivery
Create the list in List Definitions
1. In the XDOC Admin, go to Project Repository>List Definitions
2. Click the CREATE button
3. The List Editor will appear
4. Fill out all fields as you did in the previous example
5. Click the Add List Entry button and add the entry
6. Do this for all entries until the list is complete
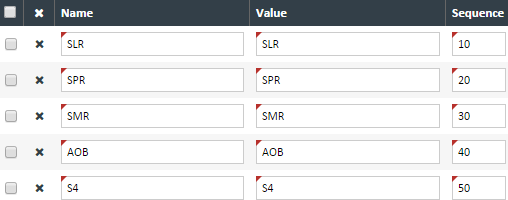
- To avoid confusion, it's best if you make the "Name" and "Value" the same
- The sequence number represents the order in which the entries of the list will appear. If all entries are the same number, the list will show in alphabetical order
7. When done, click the SAVE button
Create the Custom Property in the Custom Properties tab of the Bundle Template, incorporating the list
1. In the Bundle Template>Custom Properties tab, click the Add Property button

| Field | Description |
|---|---|
| Schema ID | The name of the property (e.g. "packageType") |
| Name | The name the user will see: "Package Type" |
| Required | Determines if this field is required. Check this since that is required in this example |
| Override | Determines if you can override this field when sending the bundle. |
| Data Type | Leave as string (or choose the appropriate option for you) |
| Validation | Choose the list you just created in the previous step |
| Default Value | If there is a default value for this field put it here, else leave it blank |
2. Click the SAVE button when done
Edit the ZIP file naming to incorporate this new property
In the Bundle Template, in Bundle Packaging tab, Package naming sub-tab, edit the "File Name" for the properties of the generated zip file to include this new property 
Note: For any customer property created, the token name will start with "$$PROPERTY." – and end with the SchemaId of the custom property – "packageType$$"
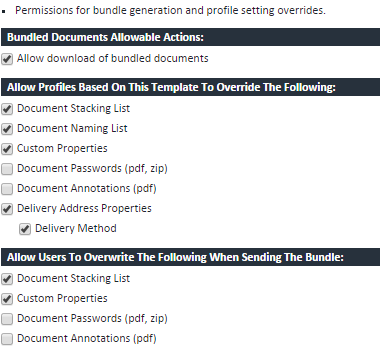
Set the appropriate permissions in the Bundle Template It is recommended that you check the following override boxes in the "Permissions" tab of the Bundle Template
Test the delivery You can test the delivery by setting the Delivery Setting in the Bundle Template to "download" and verifying the file name
Other Field Definitions and List Definition Examples There can be many other examples for Field and List Definitions. If you have any further assistance that the two examples above did not provide enough guidance on, please call XDOC Customer Support.