Document Definitions
The Document Definitions screen allows you to create and edit document types, where incoming docs are indexed to. You can create as many document definitions as you like to fit your business process. You can find this information in the XDOC Admin in Project Repository> Document Definitions.

Creating a New Document Definition
1. From the Document Definition screen, click CREATE. The Document Definition Editor will appear.
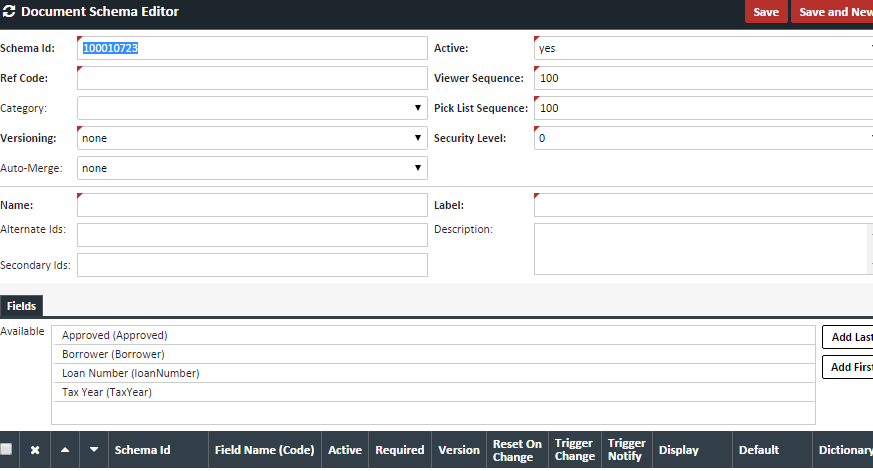
2. Enter the following information in the upper section of the Editor.
| Field | Definition |
|---|---|
| Schema ID | Unique ID for the document type. This field will be auto-populated with the next available number |
| Ref Code | Additional Code for this document type that is used in document naming and bar code matching. It is recommended that there be no spaces in whatever name/code you choose. |
| Category (optional) | Defines the grouping of the doc types for display in the document viewer. For more information on Document Categories, please see that section of the documentation. |
| Security Level | This field is not currently used and can be ignored |
| Viewer Sequence | The sequence (order) of where the document will appear in the viewer (per Category). You can either use this field to manually set a specific order, or set all docs to the same number, such as 100 (the default). If all docs are set to the same number, they will appear in alphabetical order (unless you are using a document stack, in which they will appear in the order defined in the stack. |
| Pick List Sequence | The sequence of where the document will appear in the drop down list when indexing documents. You can either use this field to manually set a specific order, or set all docs to the same number, such as 100 (the default). If all docs are set to the same number, they will appear in alphabetical order (unless you are using a document stack, in which they will appear in the order defined in the stack. |
| Active | Yes or No. Determines where the document is active or not. If not active, this document type will not appear in any drop down list for indexing. It will still appear in the viewer. |
| Versioning | Choices are None, Version, and Version and Automerge: None – Multiple docs indexed to this doc type will appear as separate entries in the viewer. All of these docs will be sent to a bundling recipient Version – Multiple docs indexed to this doc type will appear as one entry in the viewer, with previous versions nested under it. Only the doc marked as the active version (the one with the radio button checked), will be sent to a bundling recipient Version and Automerge – Multiple docs indexed to this doc type will appears one document with all pages merged together. The order in which the pages are merged is set in the "Auto-merge" field. |
| Auto-Merge | This field is only valid if the “Versioning” field is set to "version and automerge." When automerging, determines where newly indexed pages are placed. The two choices are "dd new pages first" and "add new pages last." All pages will be send to a bundling recipient |
| Name | The name assigned to the document type |
| Label | The label of the document. This can be the more common name, or a short name for the document type. This is the value that will show in any drop down lists for indexing |
| Description (optional) | Optional field to describe more about the document type |
| Alternate Ids | Alternate identifiers for the document, used mainly in bar coding. You can have an unlimited number of Alternate Ids for a document type, so long as each entry is separated by a comma |
| Secondary Ids | Secondary Alternate Identifiers for the document. These are only used if a document provider does not have separate identifiers, for example, for application vs. closing docs. In this instance the XDOC Administrator can add the same code in the "Secondary Ids" field, set the Admin option to choose to use these secondary ids. (Project Settings>Workflow Settings) and if the user chooses to use the secondary option, documents with the same code can go to two different document types, where one is an application doc and the other is a closing doc. |
3. Assign any document fields (if applicable) - Document fields are used to assign additional properties to a document type in order to provide a more detailed classification. You can add fields to assign a borrower or borrower lists, to assign a status of the doc, or indicate document approval. To assign a field: a. Under the "Fields" tab in the Document Schema Editor, in the list of available fields, choose the field you want to associate to this document and click ADD, or simply double-click on the field. 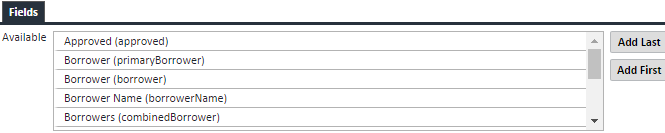
b. Once chosen, you will see a list of additional fields to complete

| Field Label | Field Definition |
|---|---|
| Active | Checked by default, determines if this field is actively in use |
| Required | If checked, when indexing a document, completion of this field will be required |
| Version | This field only works when the document itself is versioned. When this box is checked, signifies that the document should take into account this field when versioning. For example, if a document comes in and is assigned to John Homeowner and another doc of this type comes in and is assigned to Mary Homeowner, they should be treated as separate docs, both of which will be sent to a bundling recipient. This box should always be checked if the field name is borrower-related |
| Reset on Change Trigger Change |
Reset on Change and Trigger Change work together. They control which fields are "reset" to their "default value" when a document changes. A document is "changed" when one of the following occurs:
|
| Trigger Notify | Reserved for future use |
| Display | Indicate whether or not the field will be displayed in the Property Editor, and if it is, whether or not it can be edited. |
| Default | The default value for this field. For check box fields, use the Boolean value 0 for unchecked, 1 for checked Dictionary If there is a list associated to this field, you can choose it from the dropdown list |
c. When all fields have been completed, click SAVE
Deactivating a Document Definition - From time to time a document definition that has been in use for some time becomes no longer valid or useful for your business. In this instance you can deactivate the document definition. This option is more preferable than deleting the document definition, which preserves the state of previous documents without letting a user assign any new docs to this document definition. There are two ways to deactivate a document definition:
1. Open the Document Schema Editor for the document and change the "Active" setting to "no"
2. From the Project Repository> Document Definitions main screen, click on the box to the left of the Schema ID and in the "select action" drop down at the top of the first page, choose "de-activate" and then click EXECUTE. When you deactivate a document definition, you will no longer see it in any dropdown list for indexing. It will however, still be available for viewing in the Viewer and for bundling.
Deleting a Document Definition - Deleting a document definition can be done from the list of document definitions on the Project Repository> Document Definitions screen. To delete any document definition, simply click on the checkbox to the left of the Schema Id field. Then click the "select action" dropdown, choose "delete" and click EXECUTE
** Caution with Deleting Document Definitions – You will not be able to delete any document definition that has documents associated to it. You must first re-assign all docs assigned to this schema Id before you can delete it. Please contact XDOC Customer Support if you encounter any issues.