Merging Documents
Merging Documents
-
Open Document Viewer
- Select the document you want to merge.
2. Click SPLIT/MERGE
-
- Located on the upper left side of the Viewer next to the UPDATE button.
- The document opens in a pop-out screen.
- Note: For Unfiled document types, this button may say Index—it works the same.
3. Search for the Loan
-
- On the right-hand side, search for the loan containing the document you want to merge with.
4. Populate Loan Number
-
- When the correct loan appears, click MERGE.
5. New Tab Opens
-
- Displays documents for the selected loan.
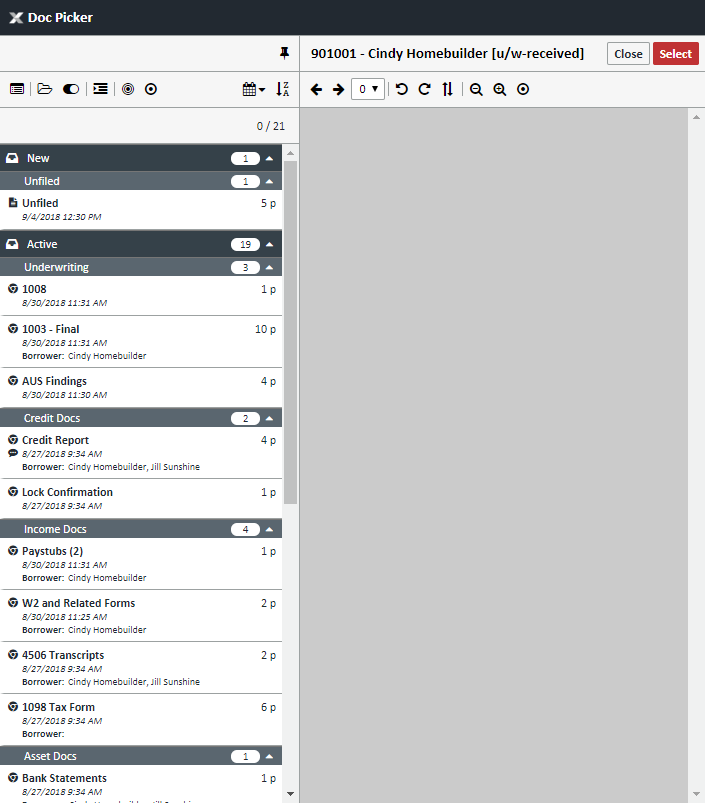
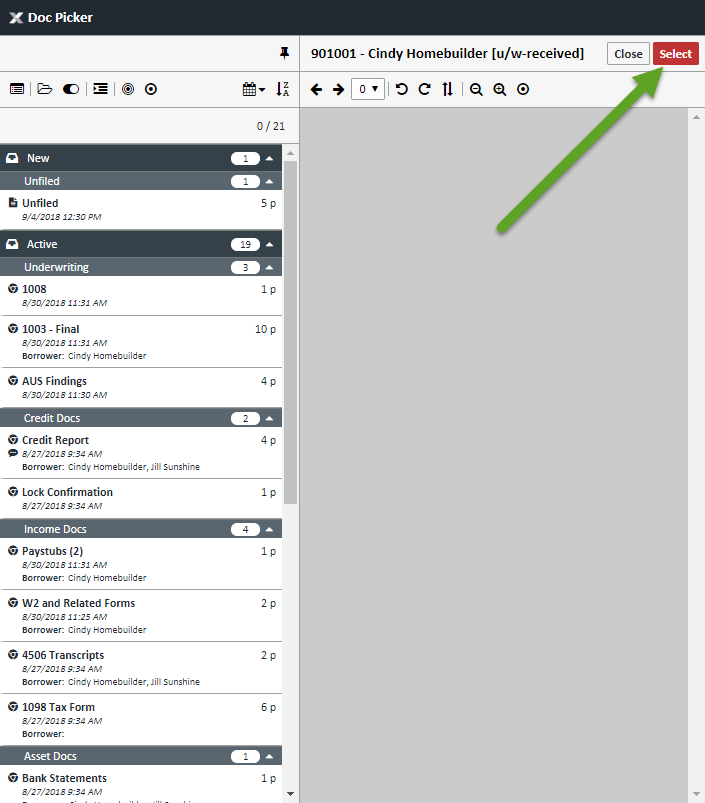
6. Select Documents to Merge
- Highlight one or multiple documents.
- To unselect, click the document again.
- When ready, click SELECT (upper right).
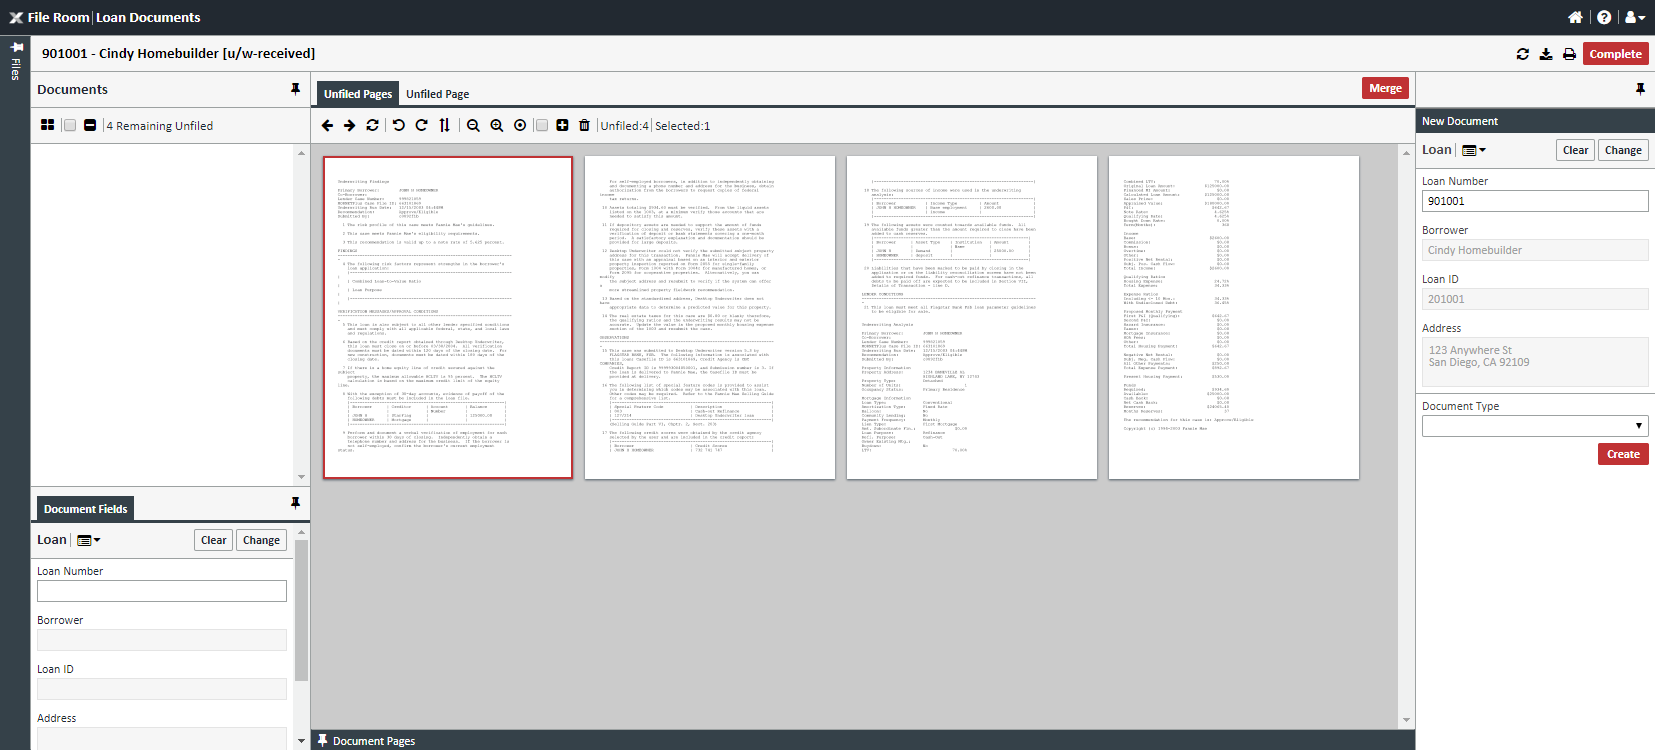
7. Merged Pages Appear
- The selected pages will now appear in the merge/split screen.
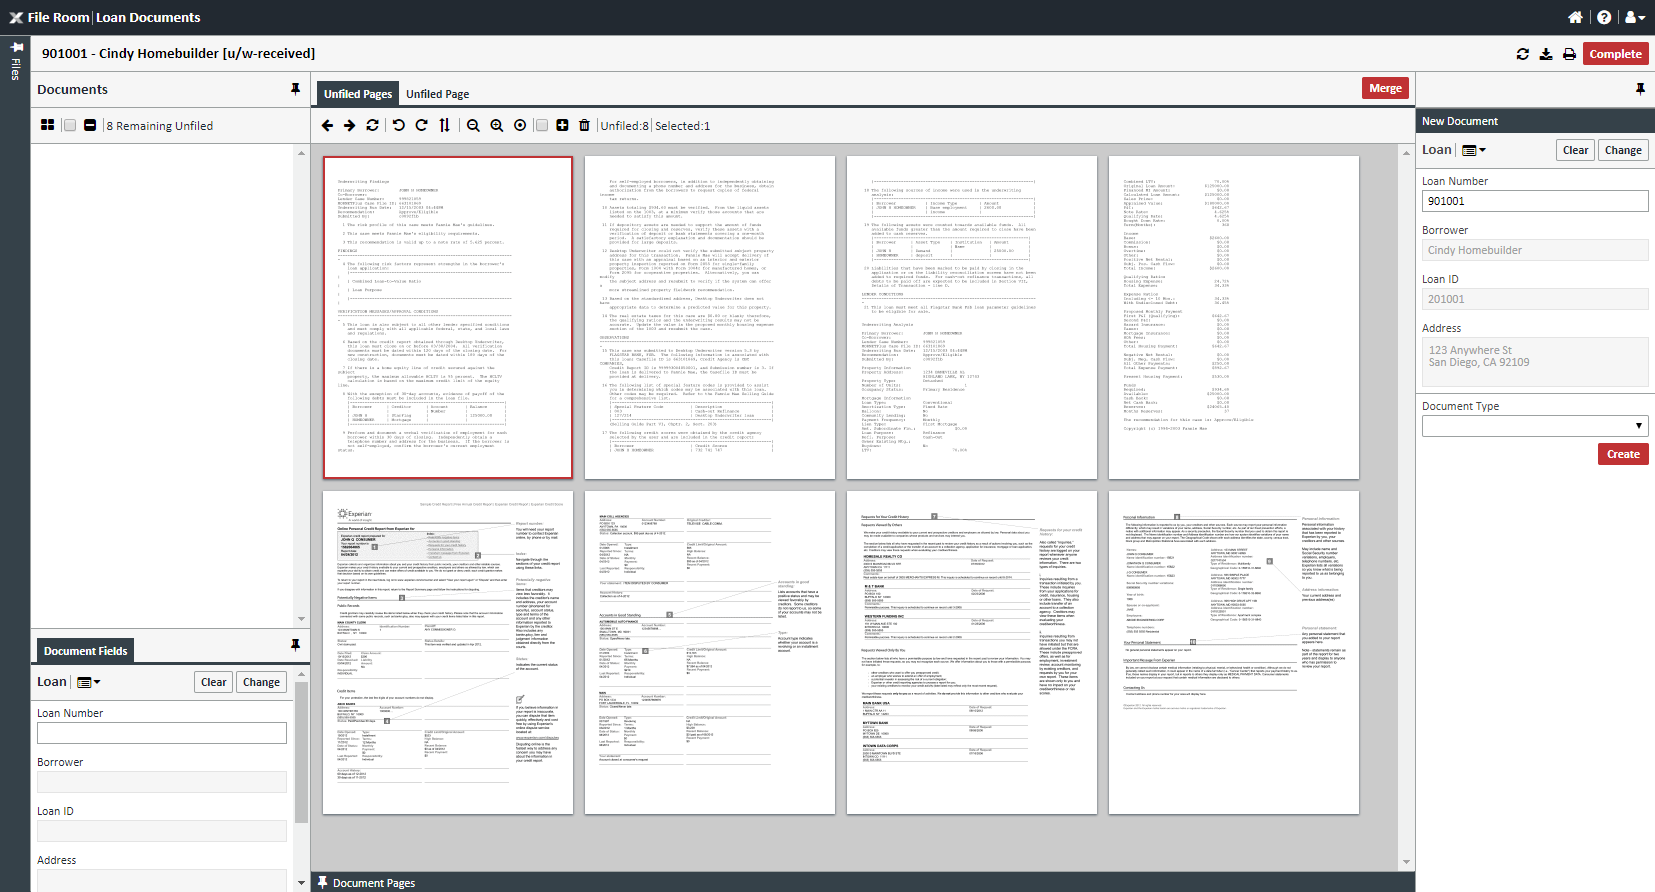
8. Handle Unfiled Pages
- In the Unfiled Pages tab, select pages to save as a separate document:
- Red border: First selected page.
- Blue border: Additional selected pages.
- Use:
- Ctrl+Click for multiple non-consecutive pages.
- Shift+Click for consecutive pages.
9. Click COMPLETE
- Finalize the merge.